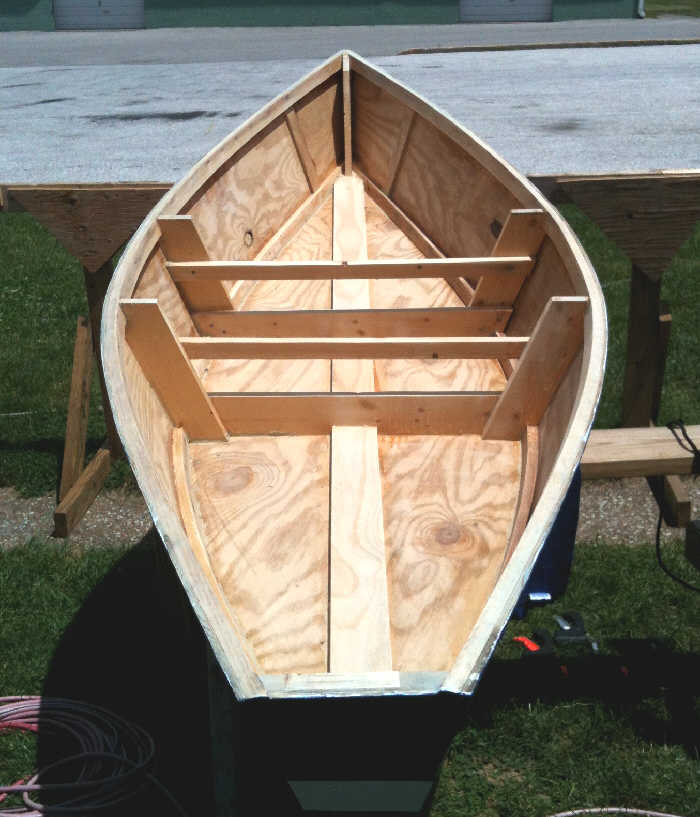
Building a Wooden Fishing Boat from Scratch: A Comprehensive Guide
Crafting a wooden fishing boat from scratch is a labor of love, a testament to skilled craftsmanship and a deep connection to the sea. This journey requires dedication, patience, and a passion for woodworking. This guide will equip you with the knowledge and steps to embark on this rewarding endeavor.
Step 1: Design and Planning
Before you begin, envision the boat you want to build. Consider factors like:
- Boat Type: Will it be a dinghy, a skiff, or a larger vessel?
- Size and Dimensions: Determine the length, width, and draft (depth of the hull) for your boat.
- Materials: Select the type of wood that suits your project - cedar, oak, pine, or plywood.
- Engine: Will it be powered by oars, a small outboard motor, or an inboard engine?
- Fishing Gear: Plan for storage space for rods, tackle, and bait.
Create detailed drawings or use pre-designed plans. Consider the weight distribution, buoyancy, and stability of the final boat.
Step 2: Gathering Materials and Tools
Acquire the following materials and tools:
- Wood: Planks, plywood, stringers, keel, ribs, and transom.
- Fasteners: Screws, bolts, nails, and rivets.
- Epoxy and Fiberglass Resin: For sealing and strengthening the hull.
- Paint and Varnish: For protection and aesthetics.
- Hand Tools: Saws, chisels, planes, hammers, and screwdrivers.
- Power Tools: Jig saw, router, belt sander, and drill press.
- Measuring and Marking Tools: Tape measure, ruler, square, protractor, and marking pencil.
Step 3: Constructing the Hull
Lay down your keel, the backbone of your boat, on a flat surface. Attach ribs to the keel at specific intervals, creating the frame for the hull.
3.1: Assembling the Frames
Using your drawings as a guide, cut and shape the ribs, stringers, and transom. Connect the ribs to the keel using strong fasteners, ensuring they are evenly spaced and plumb.
3.2: Planking the Hull
Begin attaching planks to the frame. Start at the keel and work your way up the sides. Cut each plank to fit the curve of the hull, using a jigsaw or hand saw. Use clamps to secure the planks while you fasten them.
3.3: Fairing the Hull
Once the planking is complete, use a plane, sander, and scraper to smooth out any irregularities. This process, called fairing, ensures a smooth, watertight hull.
Step 4: Applying Epoxy and Fiberglass
Epoxy resin and fiberglass cloth add strength and water resistance to the boat's hull. This step requires precise mixing and careful application.
4.1: Preparing the Hull
Clean the hull thoroughly and apply a layer of epoxy primer. Let it dry completely before proceeding.
4.2: Applying Fiberglass
Cut fiberglass cloth into manageable pieces. Mix epoxy resin according to the manufacturer's instructions and apply it to the hull with a brush or roller. Immediately lay the fiberglass cloth on the epoxy and press it into the resin, ensuring it is fully saturated.
4.3: Curing and Finishing
Allow the epoxy and fiberglass to cure completely, as per the instructions. Sand the cured fiberglass to achieve a smooth surface.
Step 5: Building the Deck and Superstructure
Construct the deck using plywood, stringers, and supports. Install hatches, seating, and any other features you want to include.
5.1: Framing the Deck
Create a frame for the deck by attaching stringers to the hull's top edges. Install cross-beams for additional support.
5.2: Installing the Deck
Lay plywood sheets over the deck frame, ensuring they are flush with the edges. Secure them with screws or nails.
5.3: Adding Features
Build seating, compartments, and other desired features. Consider incorporating fishing rod holders, tackle boxes, and bait wells.
Step 6: Finishing and Launching
Apply paint, varnish, and any decorative elements to your boat. Inspect and ensure all parts are secure and watertight.
6.1: Painting and Varnishing
Apply primer, paint, and varnish according to your design and the wood used. Use multiple coats for durability and protection.
6.2: Launching
With the boat complete, launch it into the water and ensure it floats properly. Test its stability and make any necessary adjustments.
Building a wooden fishing boat from scratch is a rewarding and challenging experience. With patience, attention to detail, and the right tools, you can create a beautiful and functional vessel that will serve you for years to come. Remember to prioritize safety and always consult with experienced boat builders for guidance.
0 comments:
Post a Comment
Note: Only a member of this blog may post a comment.